
Managing the role is very similar to how management was done in Windows Server 2003 through 2008 R2. With the exception of how you access the tools. DNS is one of the most important services in Windows Servers, as with most other platforms. So it’s important to configure DNS.
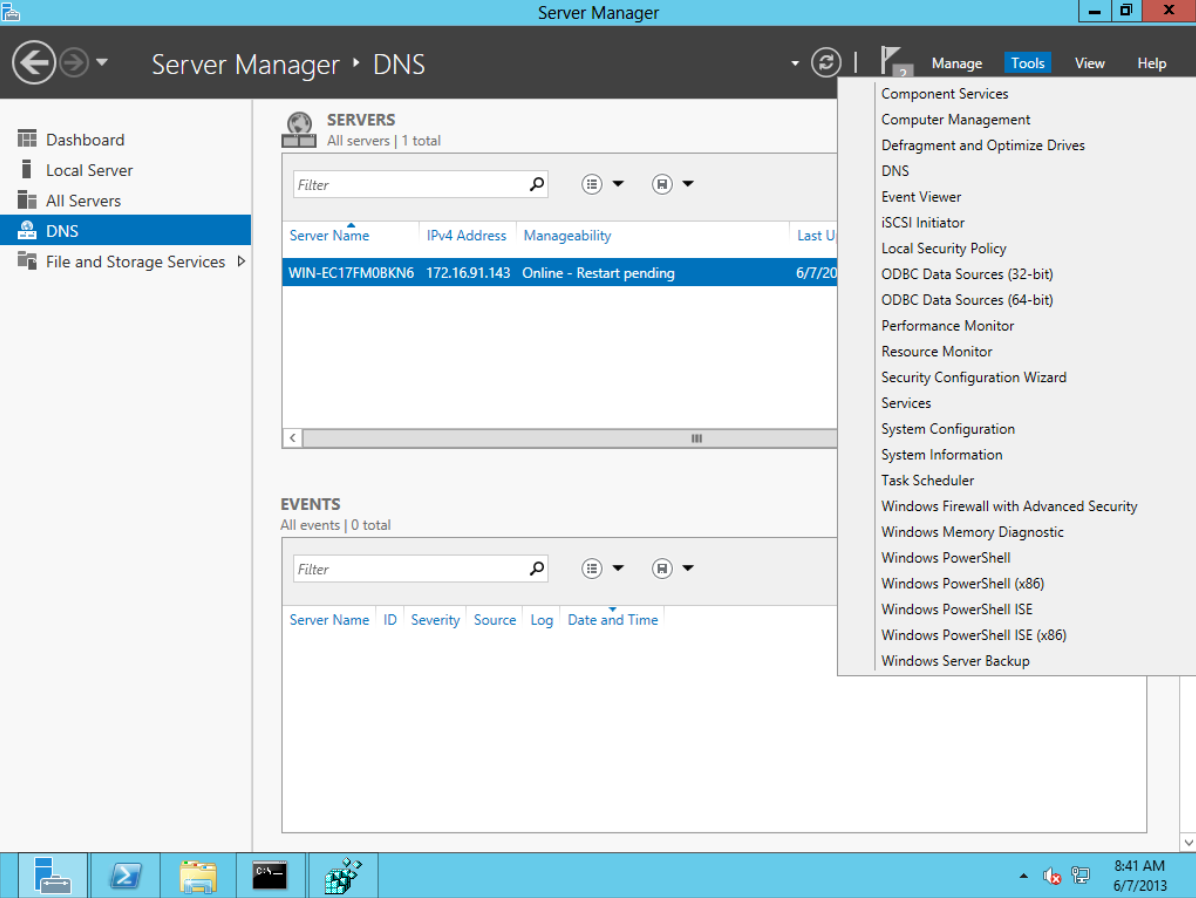
To get into the DNS Manager in 2012 Server, first open Server Manager (you might get sick of using this tool in Server 2012, similar to how my Mac Server brethren have gotten tired of it in Lion and Mountain Lion Servers. Then from Server Manager click on DNS from the Tools menu.
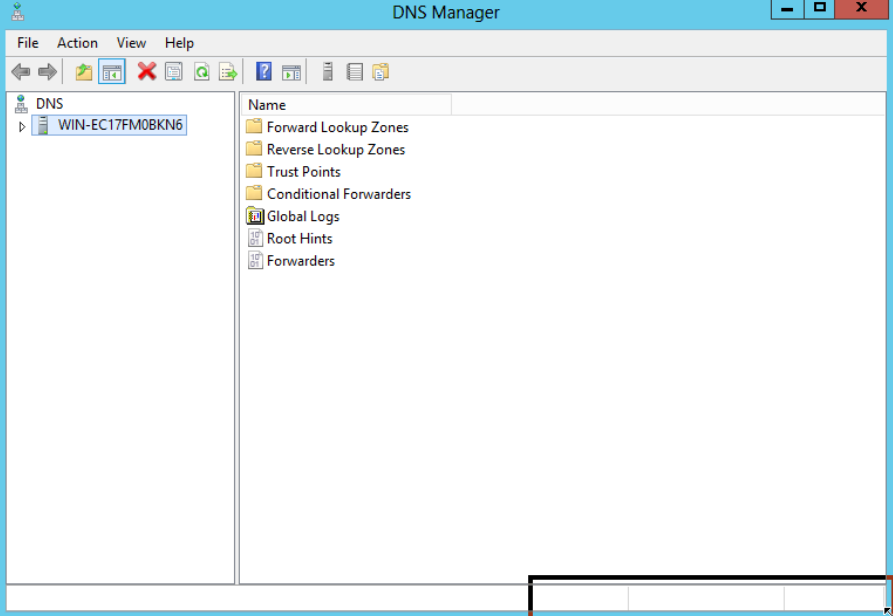
Once the DNS Manager mmc is open, notice that you will have Forward and Reverse zones listed. The forward zones point names at IP addresses or other types of records and the reverse zones contain information about what the name is for a given IP address.
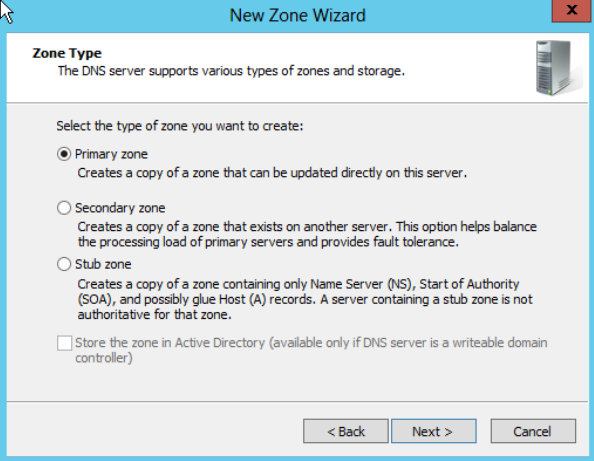
By default there are no zones, so click on New Zone from the Action menu to bring up the New Zone Wizard. From here, click on Next. If the zone is a new zone, click on New Zone. Otherwise, choose Secondary Zone if the server will be acting as a secondary name server for a given zone (make sure the primary allows zone transfers from the IP of the system you’re configuring) or select Stub Zone if the server will host a partial list of records. Click Next when you’ve selected the type of zone to create.
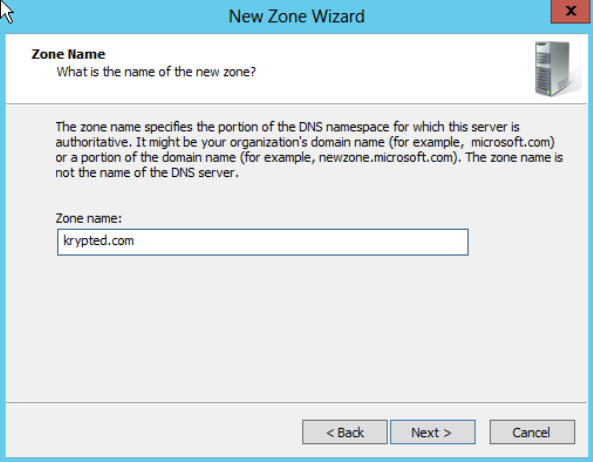
At the New Zone screen, enter a name for the zone. For example, krypted.com. Once entering the new Zone name, click Next.
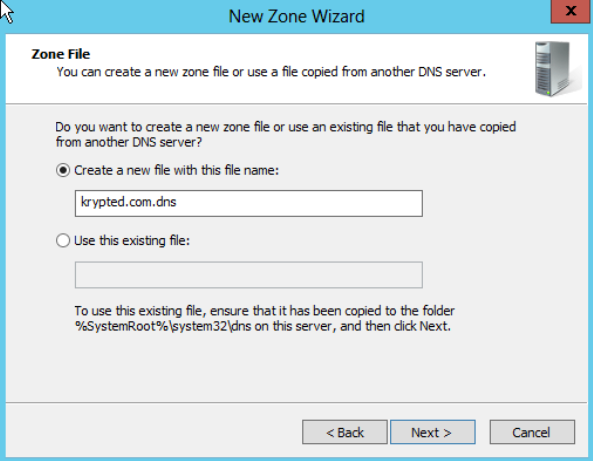
At the Zone file screen, enter a name for the file that information about the new zone will be stored in and click on the Next button.
At the Dynamic Update screen, choose whether the zone will allow dynamic updates. Here, you can choose whether clients can update DNS information in zones and if so, who can do so. I usually just leave this at the default (unless I’m preparing to install AD into the zone) and click on the Next button.

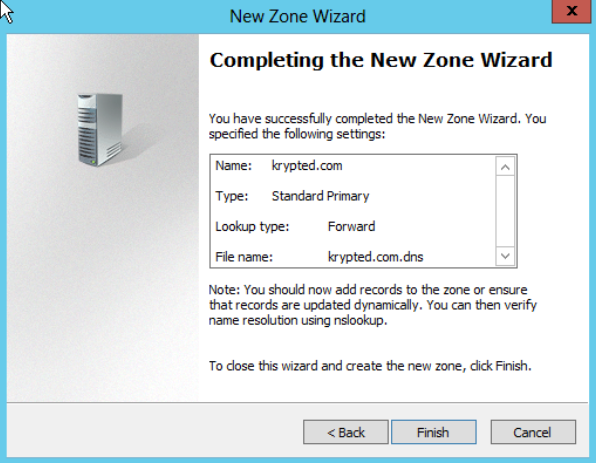
At the Completing the New Zone Wizard screen, click on the Finish button (provided of course that the settings match your desired configuration for the zone).
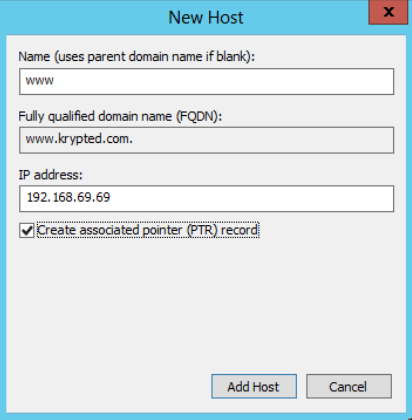
Once you see the domain name in DNS Manager, double-click on it. You’ll see the NS and SOA records. Usually you won’t ever end up touching these. Next, create records for your domain. Using the Action menu, select to create a new A Record, CNAME, etc. In this example, we’ll create a basic A Record, selecting the checkbox to automatically create a PTR with the record. Click
Continue creating your records until they’re all built and go ahead and take this time to test them as well, as they’re being created. I usually like to run a flushdns between each creation/change:
ipfconfig /flushdns
Once you’re done with all of the records, I usually like to restart DNS with net stop:
net stop dns
And of course, start it back up.
net start dns
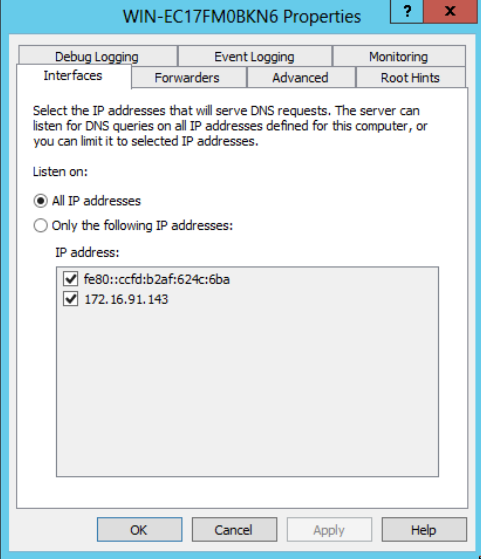
At the DNS Manager screen, right-click (control-click if you’re using a Mac) on the name of the server and then click on Properties. From the Properties screen, you’ll initially see the interface screen. Here, uncheck the box for any of the interfaces you don’t wish to have a listener for the DNS service (port 43).
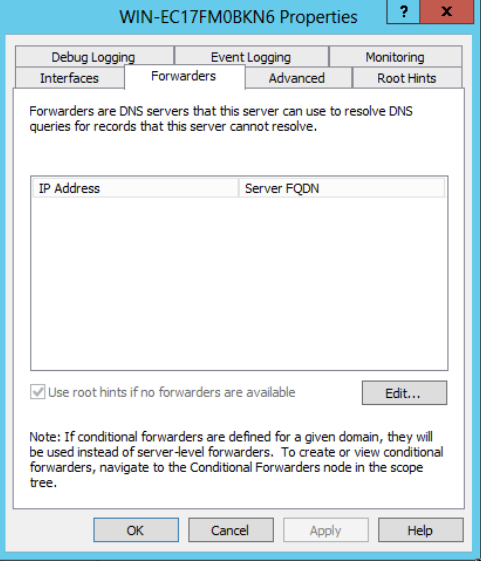
Click on the Forwarders tab. Here, define servers that your server uses to resolve DNS. DNS is kinda’ like a pyramid scheme like that. You shouldn’t need to use these too often, but there are some great options here for conditional forwards, where your server looks to a specific server for a given DNS domain.
Click on the Advanced tab. Here, you can configure a variety of server options. A common security task would be to disable recursion. If this server is an Active Directory integrated DNS server doing so would not disable additional Active Directory DNS servers from communicating with one another as they receive their DNS information from Active Directory, as can be seen in the Load zone data on startup field of this screen. The Enable BIND secondaries allows a Mac to act as a secondary DNS server for the records stored on this server. This doesn’t work too well with Active Directory service records, in my experience, but works pretty well with anything else provided you define each zone to cache.

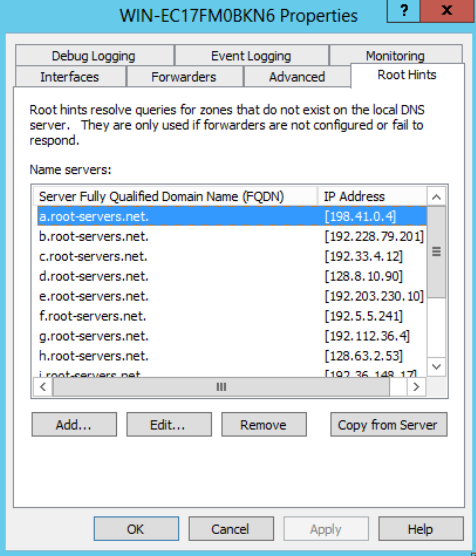
Click on Root Hints. If you need to edit these then you might be doing something wrong. Root hints are the root DNS servers that sit atop the DNS pyramid scheme. I’ve only ever needed to edit these once, at the instruction of Microsoft during a support call for an environment that was in a walled garden. If the server connects to the Internet then chances are it should use the Forwarders to resolve names as opposed to Root Hints.
Click on the Monitoring tab. Here, you can configure a small monitor that will run queries against the DNS server (or with recursion as indicated with the second option) and you can automate the test to run every so often and show the results.

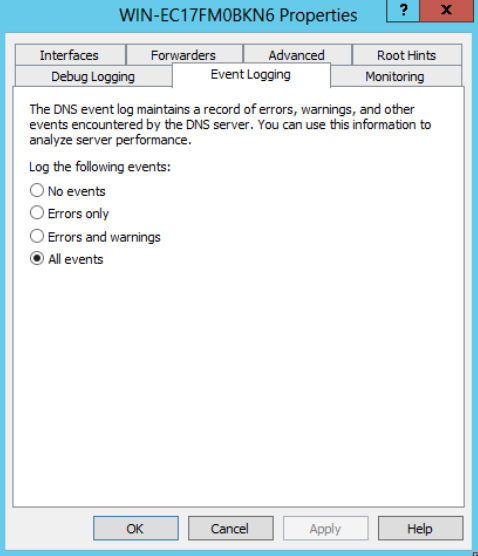
Click on the Event Logging tab. By default, all events are logged. Here, you can decrease logging so that the server only logs errors, warnings or even nothing at all.
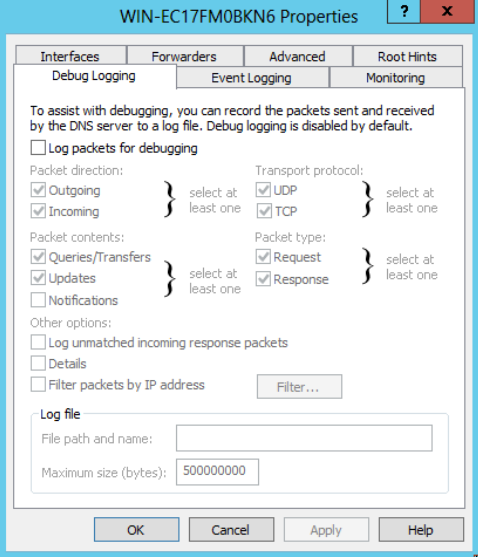
Click on the debug logging. This is like a special rockin’ tcpdump for DNS logs. You can log packets of various types with regards to name resolution, filter the output by IP address(es) and dump information out to a file. This is extremely detailed logging so you also have the option to indicate a maximum size of your log files.
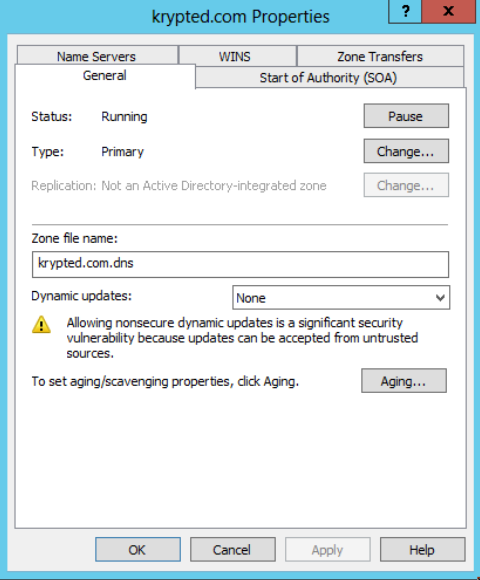
You also have more more granular controls for each domain. In the DNS Manager, right-click on your new domain and then click on Properties. Here, you’ll see the information you provided when configuring the zone in the first place (btw, zone is pretty much the same thing as domain, except each subnet of IP addresses for PTR records is also considered a zone). At the General tab you can pause a domains DNS, change the zone from a primary to a secondary if needed, etc. You can also define a different name for your zone file and enable dynamic updates. If the zone is a primary zone, click on the Aging button if you’d like to configure stale record scavenging. There, you can define when records that become stale are automatically deleted.
Click on the SOA tab. Here, you can define the serial number for the domain. Those are automatically provided but you can override them if needed. You can define primary servers if the zone is a secondary and then provide an email address/username of the user who manages the domain. Here, you also configure TTL for the domain, domain record expiry, retry intervals for the domain, etc.

At the Name Servers tab, you can add servers that this zone can be hosted on.

Click on the WINS tab. If you are integrating WINS with DNS then chances are you missed flannel going out of style. But that’s ok, since provided you’re wearing your flannel with super tight jeans that require a can opener to get off, it’s just fine to wear a flannel. Anyway, if you use WINS with DNS, you’ll need to install WINS with Server Manager. When you go to add WINS it’s a feature, not a role.

Click on Zone Transfers. This is where you define what IP addresses are able to perform a zone transfer for the domain you’re configuring. By default, all hosts from the Name Servers tab can be accessed. To open it up for everyone (not the best security option) click “To any server”, or to use a separate list than the Name Servers use the “Only to the following servers” button and then use the Edit button to populate the list.

Once you’ve configured the properties for your zone as granularly as you’d like, click Apply and then finish populating the zone with any other required records and testing all the settings. I also like to restart my DNS again after all that fun stuff
No comments:
Post a Comment